Traditionally, gskinner has been a shop with expertise in Flash/ActionScript technologies, and then JavaScript/HTML/CSS since the slow decline of Flash. However, in the past year we have spent a great deal of time working with C# and XAML, specifically on the Windows 8/8.1 and Windows Phone 8/8.1 platforms.
I’m not going to dive into the super technical aspects of C#, since there are plenty of resources available for that (I included some at the end of this article). This is more of an overview of some experiences working in a new technology stack; A brief description of differences in core concepts, language features, and a comparison of development tools our team has used.
To start off, lets jump into…
Strong Typing in C#
Coming from an ActionScript and JavaScript background, the typing in C# was definitely a change from the relative “looseness” of the previous two (especially JavaScript). AS3 was a middle ground between dynamic and strong typing, where you had to ability to specify type, but it could still be optional. However, typing is strictly enforced in C#, which felt a little jarring given our last few years in JavaScript. Everything in C# requires a type, with the exception of objects using the “dynamic” keyword – but use of this modifier should be avoided, since it negates any advantages you receive with strong typing.
We always have to keep types in mind when creating objects. For example, here is how we would create a lookup (hash table) in JavaScript:
var hash = {};
hash[“key”] = “value”;
A generic object is created, then key value pairs are stored.
However, in C#, we use a specific Dictionary typed object:
Dictionary<string, string> hash = new Dictionary<string, string>();
hash[“key”] = “value”;
We have to specify the types of both the key and value beforehand. In JS, we could associate keys with any type of value, even mixed types (not necessarily the best practice, but we worked with what we had). Again, a compromise is found in AS3, where we have a typed object, but un-typed keys and values.
Implicit typing was a neat feature that we used throughout that made things a little quicker, since Visual Studio did a nice job of showing you what each object’s type was when you hover over it. It’s a minor thing, but it saved us from typing too much over the course of a long project. Using that, the previous example could be written as:
var hash = new Dictionary<string, string>();
Method Types
Due to the strict typing, there are many more types available in C#. For example, even passing a method reference was not as simple as we what we were used to. There are multiple types used for methods – actions, funcs, and delegates – each with their own uses.
An action type describes a method with no return type:
void DoStuff() {...}
void DoStuffWithParam(string param) {...}
Action MyAction = DoStuff;
Action MyActionWithParam = DoStuffWithParam;
MyAction(); //same as calling DoStuff()
MyActionWithParam(“foo”); //same as calling DoStuffWithParam(“foo”)
A func type describes a method with a return type:
string DoStuffAndReturnString() {...}
string ParseParam(int param) {...}
Func MyFunc = DoStuffAndReturnString;
Func MyFuncParam<int, string> = ParseParam; //the return type is specified last
var myString = MyFunc(); //same as calling DoStuffAndReturnString()
var myString2 = MyFuncParam(3); //same as calling ParseParam(3)
A delegate is a type placeholder for a method, and can be used as a stand-in for different methods (similar to a single method interface, explained here). Delegates are the basis for Events in the framework.
delegate string MyDelegate(int param);
string MyMethod1(int p) {...}
string MyMethod2(int p) {...}
MyDelegate M1 = MyMethod1;
MyDelegate M2 = MyMethod2;
var myString = M1(1); //same as calling MyMethod1(1)
var myString2 = M2(1); //same as calling MyMethod2(1)
Lambda functions (or arrow functions as they will be known in ECMAScript 6) are more or less anonymous functions in shorthand. There are technical differences, which you can read here, here, and here. The previous example can be written as:
delegate string MyDelegate(int param);
MyDelegate M1 = (param) => {...} //declare method body inline
MyDelegate M2 = (param) => {...} //declare method body inline
var myString = M1(1);
var myString2 = M2(1);
All of these different approaches for dealing with method types may seem very similar, but there are technical distinctions which are better explained in the following articles:
Overview of Delegates, Actions, Funcs, Lambdas
Creating delegates manually vs using existing method types
Creating delegates manually vs using existing method types 2
Collections
In addition to method types, there are also various collection types available. In JS and AS3, arrays can be resized via push() / pop() and shift() / unshift() methods (as well as just setting the length). However, in C#, this behavior is found on typed Lists instead. Lists are similar to AS3’s Vectors, where each element has to be of the same type. Arrays in C# are also typed, and are as expected to be of fixed size.
The use of collections should be familiar to Flash developers who jumped into the Flex framework, which has similar types such as ArrayCollection. However, the advantage that C# has over AS3 when dealing with queries is…
LINQ
LINQ (Language-Integrated Query) is built-in support in C# for querying elements in a dataset. Similar to SQL, we can specify a query used to filter a set of elements from anything that implements the IEnumerable interface (which typed Lists in C# do). For example, lets say we want to get the first person named “Bob” in a large collection of people. Rather than “for-i” looping through an Array (like in JS), we can just filter using the following syntax:
List<Person> People = GetAllPersons(); //populate the collection
var PersonQuery = from Person in People where Person.FirstName == "Bob" select Person;
var FirstBob = PersonQuery.First(); //the first "Bob"
Also, this can further be simplified using a Lambda function
var FirstBob = People.Where((person) => person.FirstName == "Bob").First();
This is opposed to the typical JavaScript/AS3 approach
var firstBob;
for (var person in people) {
     if (person.firstName == “Bob”) {
          firstBob = person; break;
     }
}
Note that ECMA languages do have a filter method on Array, but it requires an additional function, and uses plain JavaScript instead of an optimized query language like Linq.
Overloading
Dealing with numerous method types was annoying at first. However, this was alleviated through the use of overloaded methods, which was another feature we have lived without for too long. Method overloading allows us to specify different signatures for the same method, so we could pass in different parameter types, and/or a different number of arguments, and specifically handle each using a separate function. There were a few times where we sorely missed this language feature when switching back to JS, where we could only do this using run-time typeof checks (or other workarounds) which is very inelegant.
void DoStuffWithParam(string param) { … }
void DoStuffWithParam(string param, int param2) { … }
void DoStuffWithParam(int param) { … }
void DoStuffWithParam(int param, int param2) { … }
In short, we had to make minor adjustments to our coding approach to accommodate type enforcement to take full advantage of the available language tools. There are a lot of options available to us in the toolset we’re given to solve various problems. With that, let’s move onto the other half of C#/XAML …
Layout with XAML
Layout in Windows apps uses XAML, a markup language – so we found ourselves often comparing it to Flex’s MXML, which many of our team members have lots of experience with. Both can be used to layout the visual components of an app, either in code, or using a wysiwyg-style editor. XAML is often accompanied by a C# file (the .cs code-behind), similar to how MXML can be accompanied by an AS3 (.as file):
<fx:Script source="MyClass.as"/>
They are usually paired when creating views; the XAML portion deals with the layout, and the code-behind can be used to handle any logic needed (click events, dynamic layout, etc.).
XAML controls separate logic and their layout with ControlTemplates, similar to how Flex components use skins. This separation allows controls to have vastly different visual appearances while keeping the same functionality. For example, changing the appearance of a button control looks like this:
<Button>
     <Button.Template>
          <ControlTemplate>
               <Image Source="http://pathToSomeImage.png"/>
          </ControlTemplate>
      </Button.Template>
</Button>
This completely changes the default button to an image. Additionally, certain controls will have a ContentTemplate as well. The main difference is that the ControlTemplate describes the visual layout of the control itself, but the ContentTemplate describes the visual layout of the content contained within the control. In the example above, the entire button would have been replaced with an image. But if all you wanted to do was tweak it so it displayed an image inside the button instead:
<Button>
     <Button.ContentTemplate>
          <DataTemplate>
               <Image Source="http://pathToSomeImage.png"/>
          </DataTemplate>
      </Button.ContentTemplate>
</Button>
Further, items meant to be populated with a set of data (like a ListView), will have an ItemTemplate instead of a ContentTemplate. In Flex terms, it is akin to a ItemRenderer view.
<ListView ItemsSource=”{Binding PeopleListData}”>
     <ListView.ItemTemplate>
          <DataTemplate>
               <TextBlock Text=”{Binding Name}”/>
               <Image Source=”{Binding Pic}”/>
          </DataTemplate>
     </ListView.ItemTemplate>
</ListView>
To summarize:
- ControlTemplates describe the visual layout of the control itself
- ContentTemplates describe the visual layout of the content contained in the control. Such as the content in buttons
- ItemTemplates describe the visual layout of each piece of data represented in a control. Such as a single item in a ListView control, similar to Item Renderers in Flex/AS3
No matter which Template you end up modifying, the basic idea is that templates affect the visual layout of the control. In our example, customizing the ControlTemplate of an existing control is extremely simplified. Normally, it would require tweaking the default control template for that control. The default control template contains the control’s default visual states, transitions, and template bindings. A more thorough explanation of styling can be found here and here.
One thing we felt was missing with XAML controls is access to the source code of the base classes. In Flex, the source for components can be found and viewed and (edited directly if you lived on the edge), which we had become accustomed to. However, it is possible to browse the metadata of a control within Visual Studio, so you can browse the publicly accessible properties and methods for it.
An exhaustive explanation about all the features of XAML is beyond the scope of this little blog entry, but additional functionality in the form of dependency properties, attached properties, binding, etc, helps make XAML stand out as a powerful approach to layout.
Since I mentioned the existence of default ControlTemplates, I should also point out where a reference to them can be found. However, the easiest way of getting access to the templates is typically from Blend, which brings us to…
Design with Blend
Microsoft Blend is a powerful WYSIWYG editor that dramatically enhances your ability to work with the visual aspects of XAML layout. It’s tightly integrated with Visual Studio, and generates the appropriate code for anything you tweak in the various toolbars and panels. We found our workflow bounced often between Visual Studio for development, and Blend for design, as some XAML controls and styles are too complex to write by hand. There is some overlap, since it’s possible to view XAML layout in the limited “Design View” in Visual Studio, and to edit code in the limited “Code View” in Blend, but for the most part, development and design are split between these two applications.
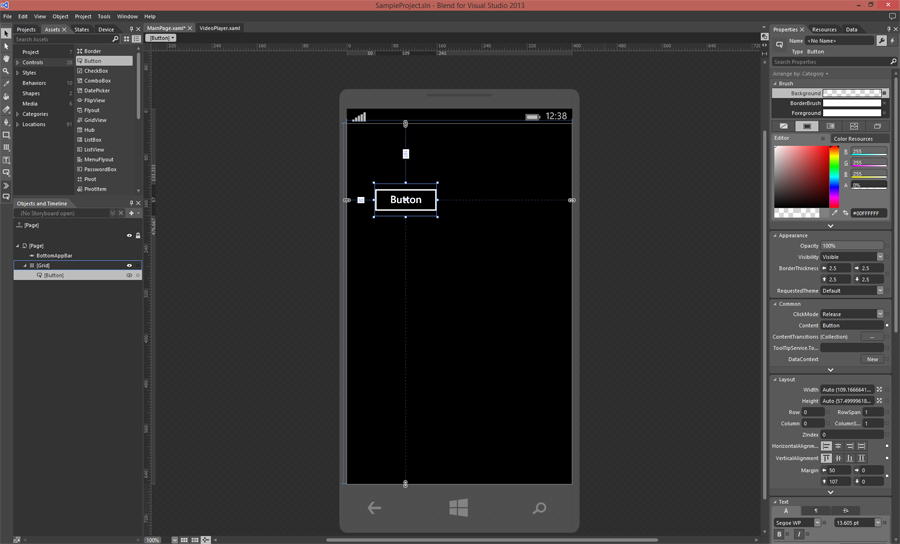
Blend for Visual Studio 2013
As dsicussed earlier, one area where Blend really comes into play is its ability to import and edit default ControlTemplates. This is the easiest way to dissect a control and customize it to your liking without having to dig through the documentation and build it up from scratch. By selecting a control, you can choose to edit a copy of the default ControlTemplate, and have it applicable to that one control, or even replace all controls of that type throughout the application.
We didn’t always use Blend to build our views, but it was useful for being able to quickly see what a view would look like, without the need to compile the application. This live preview is similar to what the Design View offered on Flash Builder (although removed since version 4.7 or so) and turned out to be one of the more useful features of Blend. When paired with the ability to configure design-time (fake) data to populate list boxes and other item renderers, live preview gave our designers a quick way to work with layout and styling with great precision, along with the convenience of seeing their changes in real-time.
Blend is a pretty solid development tool, both for visual and code changes to the layout of an application. Speaking of development tools, let’s move on to…
Development with Visual Studio
Visual Studio 2013 (v12) is the latest Integrated Development Environment (IDE) we have used for C# and XAML development to date, and is the equivalent of Flash Builder for ActionScript, or WebStorm, which our developers use heavily for HTML/JavaScript development. They are all powerful tools that feature code-hinting, code-completion, debugging, profiling, testing, and build processes (to name a few core features).

Visual Studio 2013
In Flash Builder, customizing the build process was fairly straightforward with Ant, and automation tools like Grunt are essential in our JS development workflow. MSBuild is another powerful tool available in Visual Studio, but has a learning curve, which seems to be a common trend in this environment.
One standout in Visual Studio is the great selection of extensions and plugins available. Some of the plugins we found useful in our workflow include CodeMaid, which allowed us to quickly clean up our code and remove unused imports (“using” directives in C# terms), and Productivity Power Tools, which is a suite of tweaks and upgrades to Visual Studio, such as the ability to ctrl+click a piece of code to peek at it’s definition, and error highlighting in the Solution explorer (the file tree of the project).
The ability to remotely run a debug version of our app on touch devices (such as the Surface) allowed the use of our monitors for fullscreen breakpointing and debugging. Being able to touch and interact with our applications on devices helped us gain a better understanding of UX and performance in the real world. Simulators are also available for both Windows Phone and Surfaces if hardware is not readily available. There is also a familiar “Immediate Window” which allows you to run your own code while in a breakpoint. It is scoped to current context of the breakpoint you’re currently in, which is useful for debugging and testing on the fly. These two debugging features heavily used in our workflow.
Visual Studio and Blend have their quirks, but what tool doesn’t? Overall it was a versatile environment that became more familiar over time.
Working with multiple projects in VS was handled with “Solutions”, which is akin to the “Workspaces” that Flash Builder offered. The ability to add multiple projects to a single solution was a nice touch, and is particularly handy when developing universal apps. This allowed us to have a distinct project targeting Windows, another targeting Windows Phone, and common code shared between them.
There were some quirks and bugs that we found with VS, such as the need to clean the solution constantly, or even a full “close and restart” of the program to fix compiler issues. However, for the most part it worked nicely. The code-hinting, code completion, debugging options, profiling, and other features are on par with other modern, full featured IDE’s. Those used to Flash Builder for AS3 or WebStorm for JS will be able to find their way around VS. It’s pretty much just boils down to personal preference, and experience through usage. Visual Studio and Blend have their quirks, but what tool doesn’t? Overall it was a versatile environment that became more familiar over time.
On the subject of sharing code…
Sharing is Caring
Sharing code between projects can be accomplished with the use of DLL’s or shared source files. DLL’s (dynamically linked libraries) can be created with Portable Class Libraries (PCL) in Visual Studio. They allow the sharing of code on the binary level. PCL’s are compiled into .dll files that can be imported into different projects. This is comparable to .swc files in Flash. There are some limitations with this approach: XAML is not supported in a PCL so you’re limited to sharing C# code only, which meant we had to create distinct view XAML for each platform we deployed on. Also, you are limited to a subset of the API’s available to the platforms you’re targeting. For example, the Windows.Phone.UI.Input.HardwareButtons class is not available in PCL projects because it is phone specific.
Since the introduction of the Universal app concept in Win 8.1/Win Phone 8.1, sharing source has been extended to sharing entire projects. Before this, code could be shared with linked source files, but on a single file-by-file basis. The basic premise is code that referenced/shared across projects and can be changed without the need to recompile a .dll file. One advantage of this approach is the availability of conditional compilation, so we can separate platform specific code, which is not available in PCLs.
Since PCL’s produce a binary file, it seems better for sharing among projects. Due to the limitations of PCL’s (lack of conditional compiling and reduced API set depending on targeted platforms), the contained code may need a higher level of abstraction. Shared projects tend to be more suited for targeting different platforms in the same solution; their support for conditional compiling is good for keeping a single codebase with tweaks for different platforms. However, it should be noted that this can get messy and unwieldy if not carefully managed. Also, shared projects with unit testing will need separate tests for each platform, whereas PCL’s will only require one.
The Little Things
Getting started definitely felt like slow process. Everything from the unfamiliarity with the API’s, syntax, framework paradigms, concepts, and workflows ensured plenty of reading during each step of the way. When starting from square one, even minor things such as tracing a message to console required referencing documentation:
System.Diagnostics.Debug.WriteLine("hello world");
We found the MSDN docs to be extensive, but confusing with all the different versions of .NET, not to mention all the platforms floating out there. In contrast, the AS3 documentation seemed easier to filter through and find particular classes. This is understandable though, since the .NET framework is larger than the Flash/Flex platform as a whole. .NET is a massive framework that encompasses class libraries, multiple languages (C#, Visual Basic, HTML/JS), as well as the Common Language Runtime (CLR). Since we were dealing specifically with Windows Store and Windows Phone Store apps, only a subset of the full .NET API’s were available to us. We had to be careful when looking up documentation to ensure that the classes/methods were actually supported on our target platforms. I should also note that since the release of Windows 8.1 and Windows Phone 8.1, the shared support of the Windows Runtime API (WinRT) has greatly simplified, and addressed many of the issues we ran into.
Just to summarize:
- .NET Core is a subset of full .NET API’s, for use in WinRT
- WinRT is the layer on top of Windows kernel, running Windows Store apps. It sits adjacent to Win32 layer, which runs Windows desktop apps
- Win 8.1/Win Phone 8.1 share the same WinRT
- C# version 5.0 = .NET version 4.5+
In the End
Tackling a new language and technology stack proved to be a fun, interesting, and challenging endeavor. By pushing past our comfort zone, we added to our pool of knowledge and took the lessons we learned, and applied them back to other technologies. In future articles, we may share our thoughts further on the learning curve, generics, tasks, error handling, and more.
For more information, check out:
Links
C# 5.0 in a Nutshell, 5th Edition: The Definitive Reference
An excellent in-depth book covering all aspects of the language.
http://www.dotnetperls.com/
Great website for quickly searching for terms, keywords, and concepts. Presents easy to understand explanations and examples.
https://msdn.microsoft.com/en-us/library/windows/apps/xaml/hh700354.aspx
Overview of XAML
https://msdn.microsoft.com/en-us/library/windows/apps/br211377.aspx
Windows API reference for Windows Runtime apps
https://dev.windows.com/en-us/getstarted
Dev Center for Windows Store Apps
https://msdn.microsoft.com/en-us/windows/hardware/gg507680
Dev Center for Windows Hardware (Phone) Apps
Excellent post! We are linking to this great post on our website.
Keepp up the goopd writing.