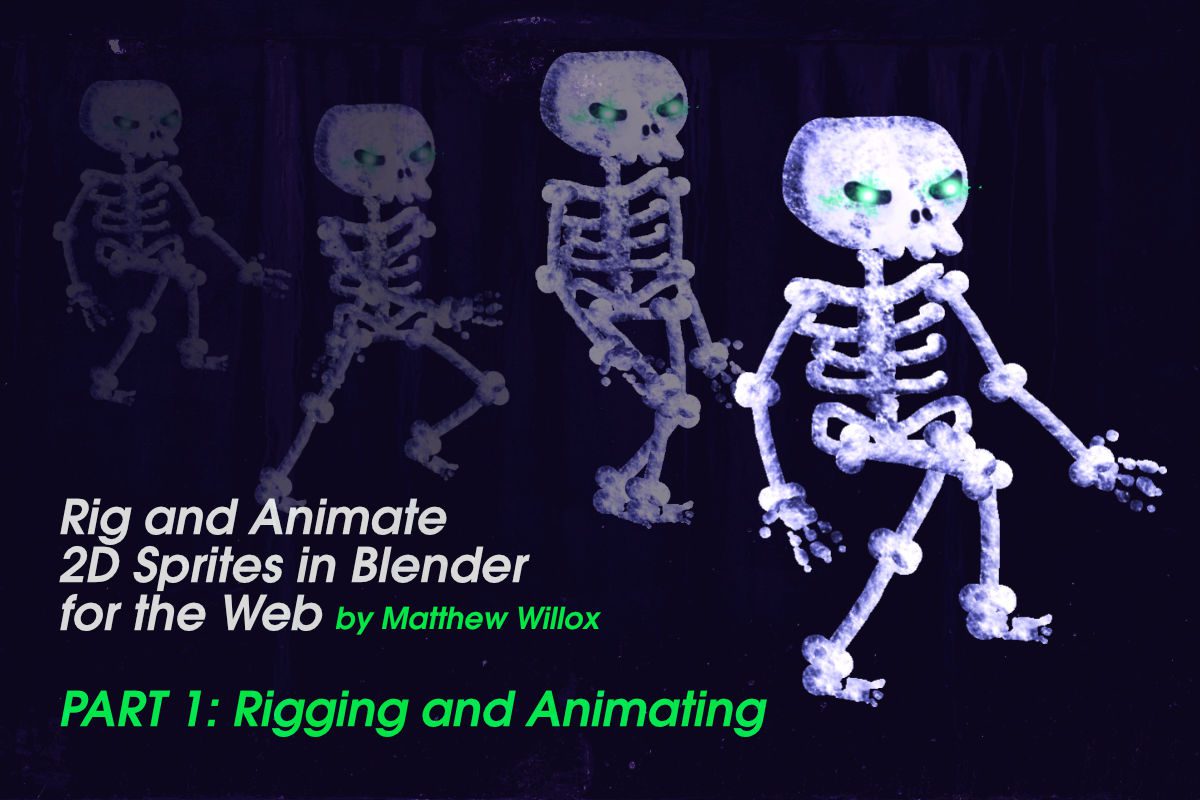
This is a two part tutorial that explains how to rig and animate 2D sprites in Blender and export them for use on the internet.
There are many tools available to help animate 2D sprites, such as Adobe Animate, Spine, and Spriter to name a few. Each of them allows for the creation of modular animations which enable the creation of expressive characters.
Animating with Blender
What about Blender? Blender has a full set of animation tools, including armatures, IK and physics (which you can bake into your animations). Can we use Blender to animate our 2D assets? Yes!
Once we’ve completed our animation, we’ll export it to a web-friendly interchange format called GLTF. To show the exported file on the web, we’ll be using ThreeJS, but any library or application that supports the GLTF format can be used. Also, if you’re using game engines like Unity, most of what applies here should work in your Unity game as well.
Before we start, here is an example of the outcome. I’m not the greatest animator in the world so please take this with a grain of salt.
Getting Set Up
Things you will need:
- Blender 3D
- Download the Khronos Blender GLTF exporter and follow the installation instructions.
- A project setup to use ThreeJS.
- A 2D sprite, character or image that you want to animate.
You can also skip having to setup your own project by downloading this one that I have setup for you. It also includes a sprite to work with and all the stages of the rigged model in case you get lost and need to compare your work.
Creating the Texture (Your Sprite)
First we need to create the character we’re going to animate. Here is one I quickly whipped up. Create a canvas for your sprite that is a power of 2 in size. Mine is 512×512. That’s more than enough.
-
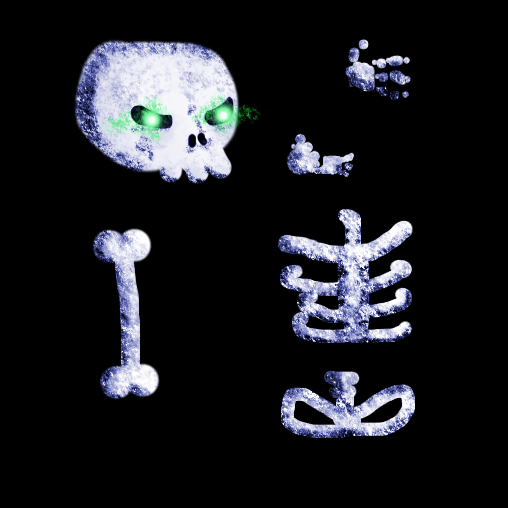
Don’t look directly in his eyes!

Notice how we don’t need to worry too much about where stuff is placed. The more parts we have, the denser we can pack them into this one texture. Give yourself room to add more stuff later if you want. Like a hat. Maybe this undead skellie likes hats.
For our purposes, we need to worry about the parts. My cartoon skeleton consists of a head, torso, hips, hands, feet and miscellaneous “bones.”
Export your sprite as a transparent PNG with dimensions that are a power of 2 (2, 4, 8, 16, 32, 64, 128, 256, 512, 1024, 2048 etc).
Creating the Mesh
- Place your sprite in Illustrator (or Inkscape, Affinity Designer, etc.)
- Draw a vector path around it (it doesn’t need to be exact). Avoid fitting the path too tightly. This will be detrimental later when you want to animate it or edit it.
-

You need a loose fitting outline. It doesn’t need to be exact.
-
- Export as SVG.
- Import SVG into Blender.
- Convert it into a Mesh. Press Alt-C to convert the curves to meshes.
-
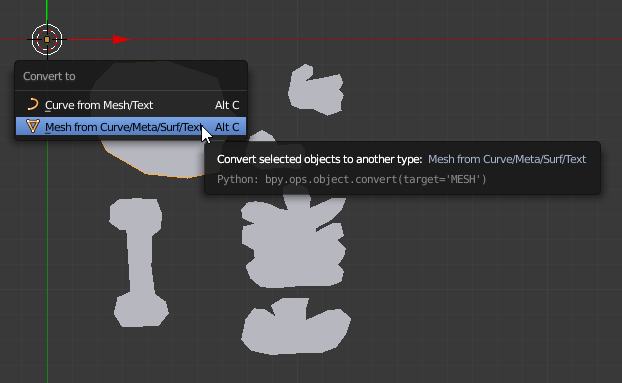
The key command Alt-C will give you a context menu. Select “Mesh from Curve/Meta/Surf/Text to convert the SVG paths into a static mesh.
-
- Select all and hit Control-J to join them all together into a single mesh. Go into Edit Mode and you should have something which looks roughly like this.
-
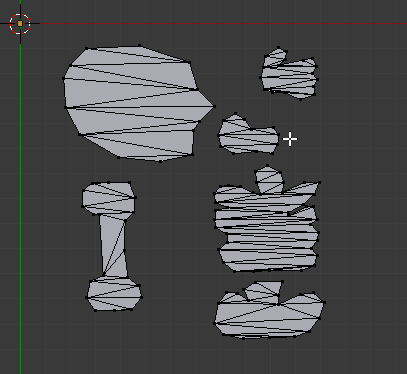
The skeleton… skeleton? Not quite yet.
-


Getting your Sprite onto the Mesh
- Let’s generate the UVs for your mesh. Make sure you’re looking down on your mesh. Go into Edit Mode, select all the vertices, and hit U to start the UV unwrap. Select the Project From View unwrap method.
-
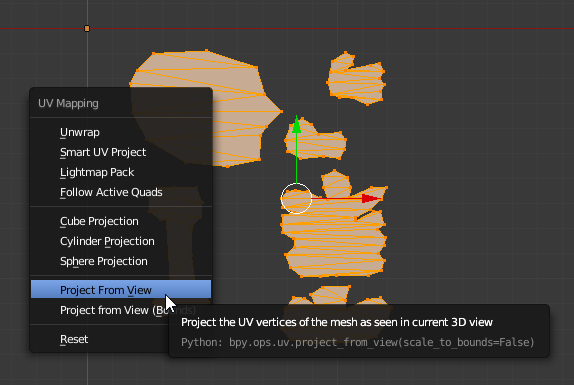
Project From View will make a UV Map that looks exactly how your mesh looks in the viewport.
Go to the UV Editor using the Change Editor Type Selector
-
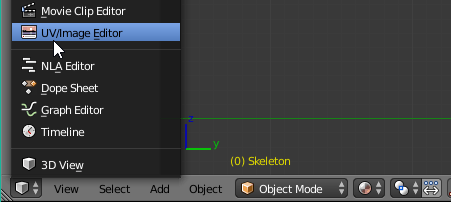
That little box in the corner of pretty much every view is called the Change Editor Type Selector.
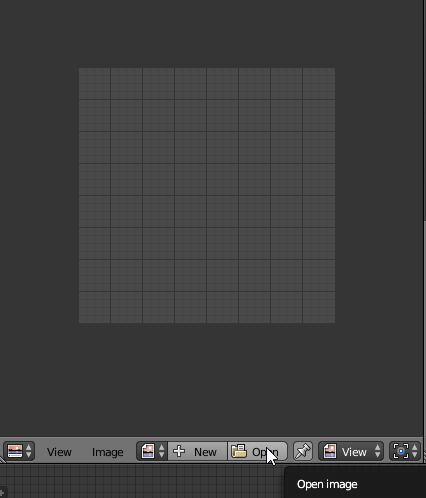
Using the UV Editor Toolbar, load in the spite.
With all of the vertices selected, scale and move your UVs until they are in the right position. Do not edit the points of the UV as this will cause warping in the image of your sprite.
-
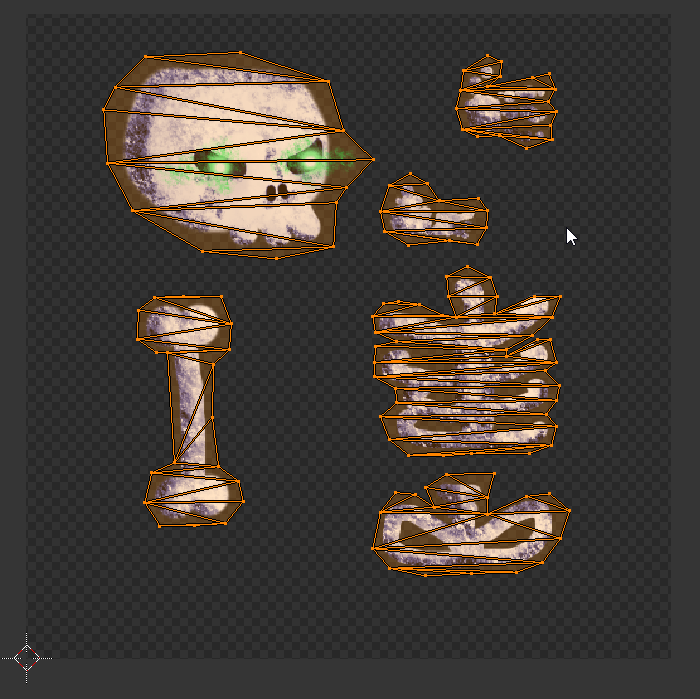
If you know a more reliable way to align the sprite and the UVs let me know in the comments.
-
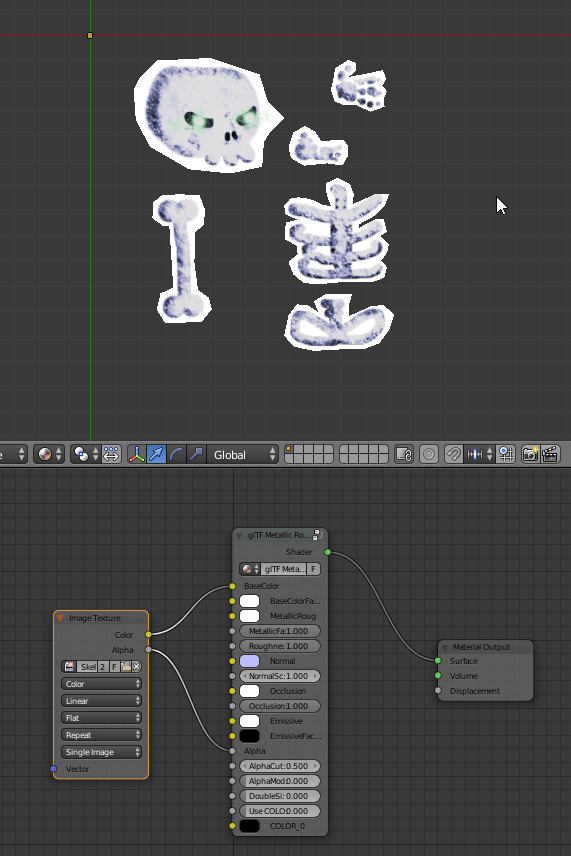
- In order to have the materials assigned to your objects automatically on export, you have to use the material nodes supplied with the exporter.
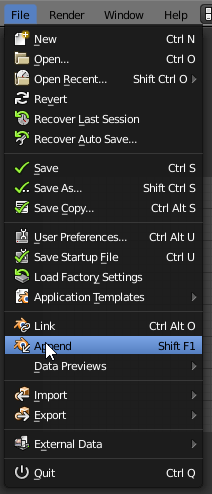
Navigate to where you downloaded the Khronos GLTF Loader. In that folder there will be another folder labelled pbr_node.

Pick the glTF2.blend file.

Navigate to the NodeTree section of the blend file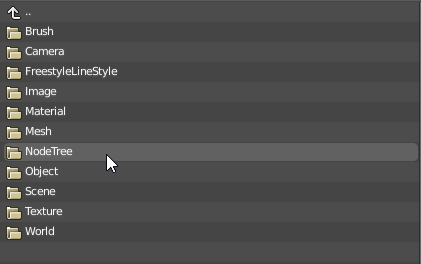 Select the glTF Metallic Roughness Material
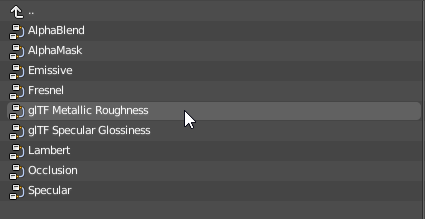
- Before you create your material set the render mode to Cycles. This gives you a more accurate representation of the final product.
- Optional: Remove any existing materials (usually SVGMat.XXX)
- Create a new material called “Skeleton”
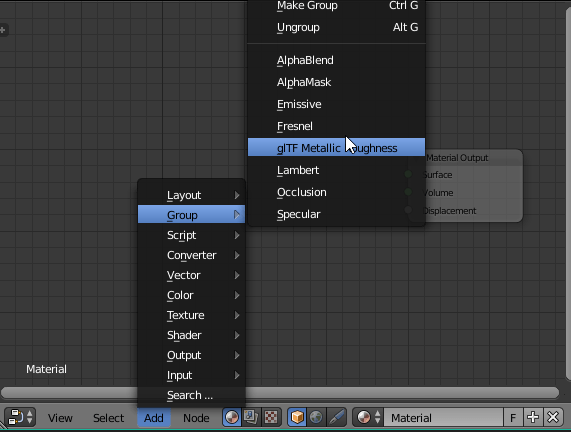
- Add a glTF Metallic Roughness node.
- Add an Image node, load your sprite into it, attach the Color output to BaseColor input, and the Alpha output to Alpha input.
- Break up the islands in your mesh into separate objects. Go into Edit Mode, select an island, and press P to separate out the selected vertices into a new object. Do this until all of the islands are separate objects.
- Arrange the islands into the shape of your character. It should look something like this. You want all the limbs spread out this way. It is the “neutral” pose.

- Rotate the mesh so that it is “standing up.” Place its feet along the red line.
- Select everything and press Control-A to apply their locations and rotations.


You should end up with something that looks like this:
-
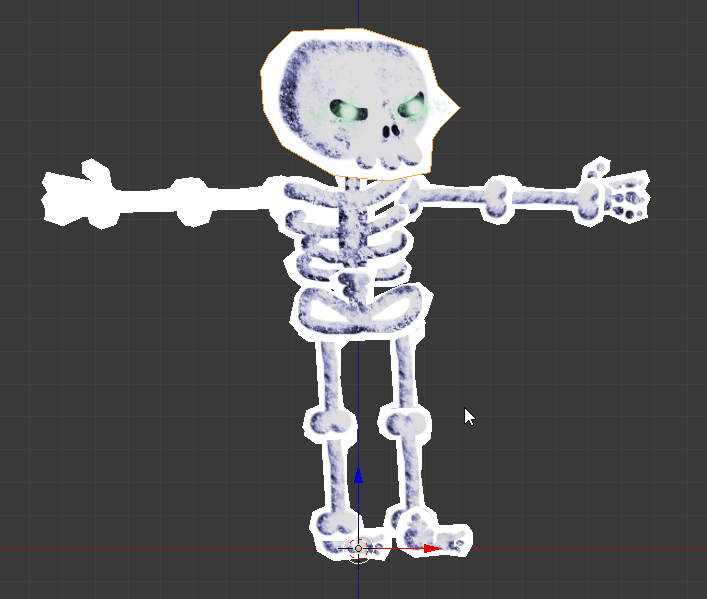
“Are you not entertained!”

Boning Your Mesh (XD)
Due to how the glTF exporter works, we can’t just jump in and start parenting bones to objects. This will produce unexpected results and your exported mesh will look wildly different from what you have in Blender.
- Select each object, go into Edit Mode, select all vertices, and create a vertex group for that object.
-
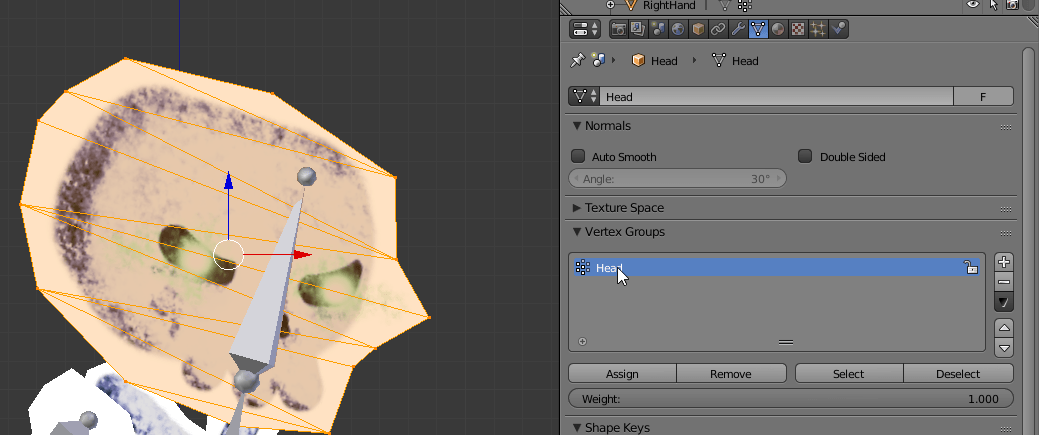
You MUST create vertex groups for each of the parts of in the mesh.
Remember the name of each vertex group for your objects (it helps to just name it the same thing as your object).
-
- Create an armature.
- Make all of the pieces of your character children of the armature.
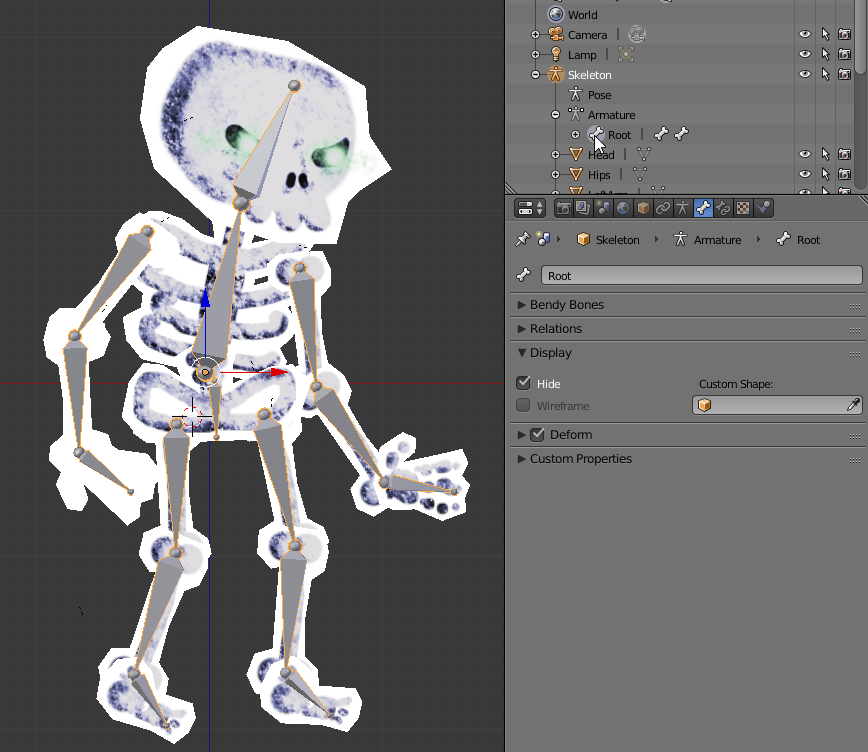
- Add a root bone. Hide it. This root bone solves some incompatibility issues with some exporters. It’s also just a good habit to get into.
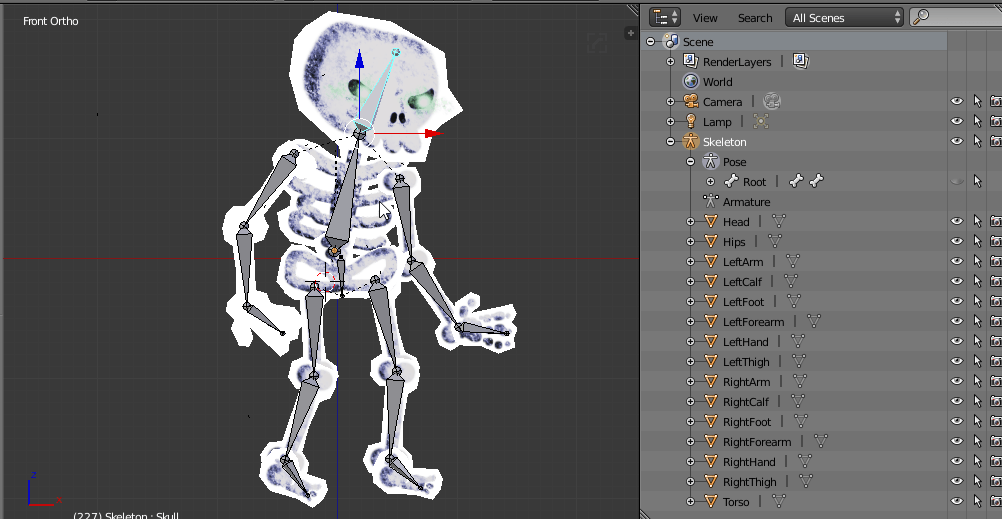
- Add bones to the armature. Place them so they correspond with objects you created earlier.
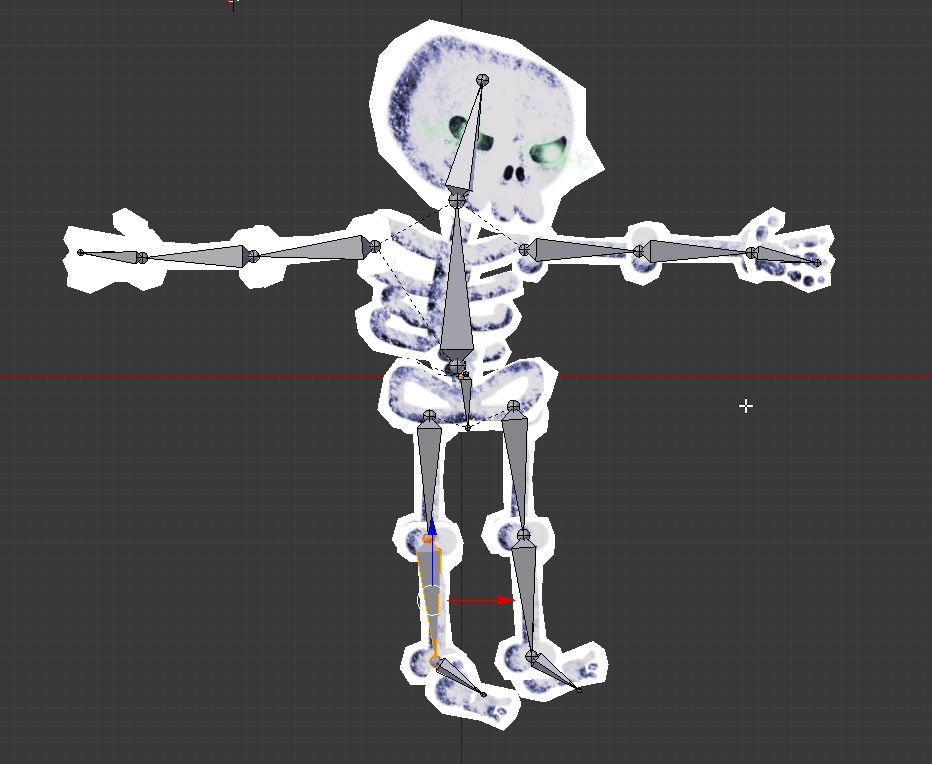
- Name each bone after the vertex group you want it to control. For example, if you have a vertex group named “Head” name the bone that controls the head… “Head”
-
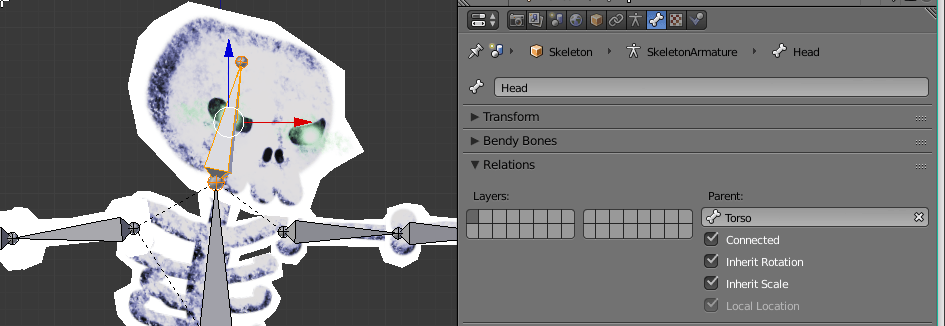
Blender will automatically associate vertex groups and bones that share the same name.
-
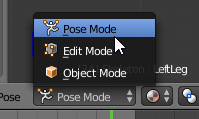
- Select your armature, go into Pose Mode. When the bones turn blue you can select them and you can move them around.
Hello.


-
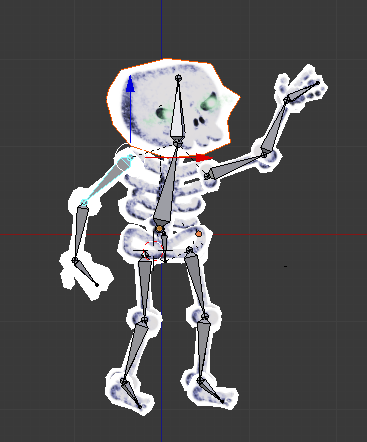
“To be… or not to be? Not really a good question for me. I’m dead and a necromancer has complete control over my will and existence.” -Skeleton

Animating
Now that your mesh is rigged, there are all sorts of amazing tools to help you animate it. You can setup IK, use physics, or just animate the bones by hand like a luddite. For the sake of brevity, I’m going to animate the bones directly.
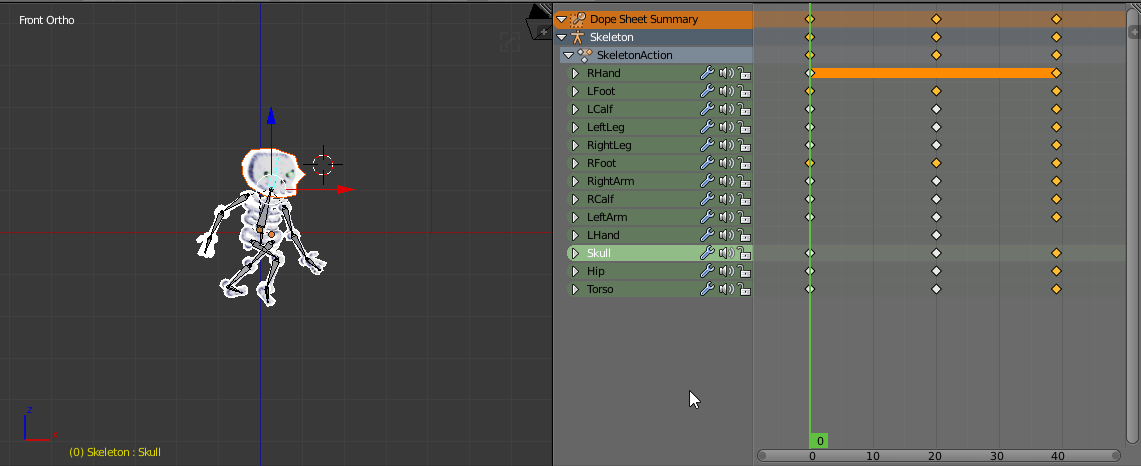
The way I like to animate walking is by setting keyframes between the two extremes and then interpolating.
First Pose:
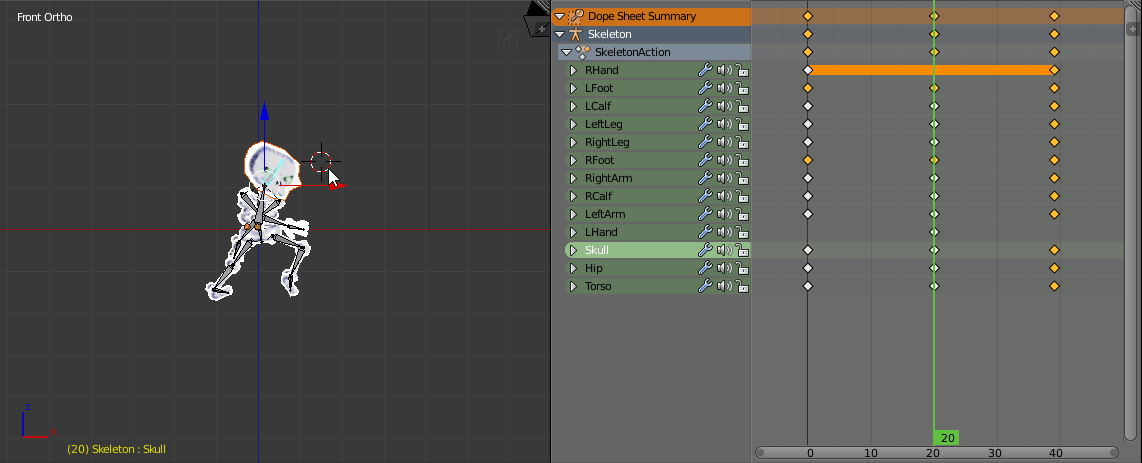
Second Pose:
The Third Pose is the First Pose again.
-
rise… RISE!

Z-Peace Accord
One thing you might notice is how the z-sorting for this skeleton is all over the place. Right now you can’t even see one arm correctly and there is z-fighting wherever two parts overlap. Luckily, fixing this is very simple.
Split the view into two panels. Put one at the front and one at the side. Select the object, go into Edit Mode and move the vertices just a little bit. You’ll be able to see in the front view that the z-issue has been solved.
You’re Done!
If you animated a skeleton like mine, congrats, you’re now officially a necromancer.
Keep going to Part 2! Exporting to ThreeJS, where we’ll prep Skellie for the web.
Hi, thanks for the tutorial, I have a question. In case I would want to change the view of the character from a side view to showing it’s back, what would be a nice way? Thanks.