One of the most interesting aspects of Flutter, is the way it mixes declarative markup-style code, with imperative business logic style code, all within the same Dart programming language and file. This creates a really nice coupling between interface and function. When compared to editing XAML for UWP apps, or XML for native Android, building interfaces in Flutter can be a very rapid workflow.
While this is really nice from a productivity standpoint, it also manifests as one of Flutters biggest issues…
Signal to Noise Ratio
Every Flutter developer is familiar with the ‘Widget Tree of Doom’. As your Widget grows in complexity and size, it’s very easy for the Widget layout to get confusing, or the business logic to get lost. This is especially true if you embed that code directly into event handlers in your widget tree.
An example of a worst case scenario, consider this 83 line ImaginaryLoginForm Widget. The actual business logic (aka the important stuff that you’ll need to debug in the future) is buried on lines 31, 63-64, and 72:
class ImaginaryLoginForm extends StatefulWidget {
  @override
  _ImaginaryLoginFormState createState() => _ImaginaryLoginFormState();
}

class _ImaginaryLoginFormState extends State<ImaginaryLoginForm> {

  MainModel _model;
  bool _isLoading;
  String _email;
  String _pass;
  String _loginFailed;

  @override
  void initState() {
    _model = Provider.of<MainModel>(context, listen: false);
    super.initState();
  }

  @override
  Widget build(BuildContext context) {
    return Align(
      alignment: Alignment.topCenter,
      child: Container(
        child: Column(
          children: [
            //Back Button
            RaisedButton(
                child: Icon(Icons.arrow_back),
                onPressed: () {
                  Navigator.pop(context);
                }),
            SizedBox(height: 10),
            Text(
              "ACCOUNT\nLOGIN",
              style: TextStyle(color: Colors.white, fontSize: 18, fontWeight: FontWeight.bold),
              textAlign: TextAlign.center,
            ),
            Flexible(child: SizedBox.expand(), flex: 1),
            TextInput("Email", (v) {
              _email = v;
            }, initialValue: _email),
            SizedBox(height: 10),
            TextInput("Password", (v) => _pass = v, isPassword: true),
            SizedBox(height: 10),
            //Show login error?
            if (_loginFailed)
              ErrorBox("Login failed. Please try again."),
            Flexible(
              child: SizedBox.expand(),
              flex: 2,
            ),
            SizedBox(height: 10),
            //Show a loading spinner if we're loading, or buttons if we're not
            (_isLoading)
                ? ProgressSpinner(color: Colors.white)
                : Column(
              children: <Widget>[
                //Sign In btn
                WhiteRoundedTextBtn(
                  label: "SIGN IN!",
                  onPressed: () {
                        //Do sign-in stuff
                        //Validate email, validate pass, etc
                  },
                ),
                //Login btn
                RoundedTextBtn(
                  bgColor: Colors.transparent,
                  label: "FORGOT PASSWORD?",
                  onPressed: () {
                    //Open the password reminder url
                  },
                )
              ],
            ),
            SizedBox(height: 40),
          ],
        ),
      ),
    );
  }
}
And this is not even a large tree by Flutter standards! Many Flutter layouts can easily stretch to 200-300+ lines if they contain multiple components or sections. The obvious issue with this, is your code becomes harder and harder to maintain, as you must sift through mounds of declarative markup, to find the code that really matters.

Ok, so we can admit the above example is a bit contrived. Most experienced Flutter developers are probably not making this mistake. A much better and more common practice is to define discrete buttons handlers for each UI event:
class _ImaginaryLoginFormState extends State<ImaginaryLoginForm> {

  ... //Initialization code, state vars etc, all go here

  //Control logic grouped together, at top of file
  void _handleLoginPressed(){
  	//Do sign-in stuff
  }

  void _handlePasswordResetPressed(){
  	//Open the password reminder url
  }

  void _handleBackPressed(){
  	Navigator.pop(context);
  }
  ... //All your view code, various builds methods, whatever goes below
}
The above is a solid approach, and following it is quite effective up to a point. Here you can see the much improved class outline, with all the important stuff grouped at the top, and the layout code at the bottom.

So this works up to a point, but eventually build() methods, which contain mounds of declarative markup code, will get created next to your control methods, which are imperative logic, and the whole thing can become a bit of a mess. Additionally, the markup code tends to be much more verbose than the control logic and will usually overpower it when they are mixed together in a single Class.
So what to do then?
There are several recommended approaches in the Flutter community today:
- Break your Widget into multiple smaller Widgets
- Use sub-build methods (buildTop, buildBottom, etc)
- Use a framework like redux, or bloc, to isolate much of the business logic and state away from the Widget completely
These are all totally solid approaches, and they do work, but they also all have their own set of drawbacks.
#1 Multiple Widgets
The problem with the first option is the boilerplate of creating classes and passing parameters around. Each class that you create will add about 6 lines to your file, plus one for every parameter it takes. It also requires refactoring as parameters change, which can slow things down.
Additionally, when designing multiple widgets, it can get a bit murky as to which code should go where, and you will often tend to move Widgets into their own files. This separates related code, and can make your life a little harder later, when you are trying to locate a specific piece of functionality or layout.
That is not to say that you shouldn’t use this technique, in fact, you should still use it heavily. Just keep in mind that it has its limitations and leads to its own issues when overused. This is a great approach when a certain Widget is clearly re-usable and makes sense as a standalone component, it’s much less effective when you’re doing it simply to shuffle around your code and essentially hide complexity across multiple files.
#2 Multiple build methods
With this method boilerplate and refactoring are still a bit of an issue, but significantly reduced. While creating a new StatelessWidget adds 6 lines + 1 or 2 for each parameter, a Function only adds 4 lines, and generally has no extra ‘line-cost’ for parameters.
Unfortunately, this approach does still have a couple issues:
- It spreads the code out throughout the widget, forcing you to jump around in the file. Related layout code tends to get spread throughout the file, making it harder to find things, and increasing cognitive load when reading the tree.
- If you aren’t careful, you can dirties up your class outline, mixing build methods with control logic, which can quickly get out of control.
- There is still a decent amount of boilerplate with Functions, and parameter passing (themes, colors, padding etc) which is a still a bit of an efficiency drag.
In both cases, the widgets don’t tend to scale very well as your business logic and layout grows. If you imagine a large settings panel, things would get very large and unwieldy when everything is combined all in one class. You end up being forced to split things into multiple files in order to stay clean, but this adds extra boilerplate, and hardens your architecture, which in turn can make iteration and refactoring slower.
Much of the time, with both approaches, you can end up feeling like you’re just shuffling code around. Hiding the complexity, without actually reducing it in a meaningful way. You end up creating widgets that don’t really need to be Widgets, and/or splitting a single purpose-built widget into multiple related files which can lower overall readability.
#3 Frameworks
The issue with the 3rd approach is almost the opposite of the others. The various frameworks can tend to be too scale-able and too opinionated.
- Redux: If you’re not building the next Facebook, the chances are you probably don’t need anything as complex as this. There is a lot of boilerplate required, refactoring can be slow, and the learning curve is fairly steep.
- Bloc: Bloc is easier to take up than Redux, but it’s still very opinionated about how you should manage your data-flow, requires a lot of learning, and is probably overkill for 99% of Apps.
- Provider: Doesn’t really address this issue head on, although you will usually tend to place some business logic in the ChangeNotifier/Model, which can reduce scaling issue to a degree.
Sometimes you just want to ‘keep it simple’, but still have the ability to scale your views in a manageable way.
The ‘WidgetView’ Pattern
The WidgetView design pattern is simple to implement, has minimal boilerplate, and helps easily divide your views business logic from its layout. This separation helps keep your Widgets organized and maintainable as they scale.
The idea is pretty simple, and can apply to either a Stateless or Stateful Widget: Each State (or StatelessWidget), has a child WidgetView, which contains all the declarative view code.
Widget
 --> WidgetController (State)
     --> WidgetView (StatelessWidget)
The State acts as a stand-in Controller/Mediator/Presenter for the WidgetView, responding to view events and providing access to state. The WidgetView is a just a StatelessWidget that is pure layout.
This tweak to your Widget architecture is very subtle, and might seem inconsequential, but it enforces a strong high-level separation of concerns, bringing with it quite a few subtle benefits:
- Business logic can grow up to 150+ lines and still feel very manageable and easy to sort through
- Initialization code, event handlers and logic calculators, are all grouped together in one discrete place
- A widget tree stretching to 200+ lines, is not really an issue with this setup, as it’s all grouped together and nicely separated from your business logic
- The large Widget trees lets you (usually) stick to a single layout tree with a generous amount of comments, rather than a bunch of build methods, or child Widgets, which can often just obfuscate the tree.
- If you do split out build methods, at least they are not mixed directly with your control functions
- This all keeps your class outline stays very clean, important functions are easier to locate
It works similar to the Bloc pattern, in its desire to separate logic and layout, but without the dependency on Streams, or the additional layers of architectural complexity. Rather than an opinionated structure, WidgetView is an agnostic ‘best practice’ that can be combined with many different state management techniques. Specifically, community favorites like Provider or GetIt work quite nicely in conjunction with this approach.
Why use state?
You might be wondering why we would use the State object rather than just creating a dedicated ViewController object that sits on top. It seems a bit weird to have a State standing in a controller object. The simple answer is: boilerplate.
If we created a dedicated view controller, we’d have to pass through at least the initState() call, and likely other lifecycle events like didChangeDependencies or didUpdateWidget. By keeping it in State, we keep things simple, avoid fighting the framework, and end up with virtually no boilerplate.
Implementation
In its simplest form, the implementation looks like this:
class MyWidget extends StatefulWidget {
  @override
  _MyWidgetController createState() => _MyWidgetController();
}

class _MyWidgetController extends State<MyWidget> {
  @override
  Widget build(BuildContext context) => _MyWidgetView(this);

  //////////////////////////////////////////////////////////
  // UI event handlers, init code, etc goes here
  //////////////////////////////////////////////////////////

}

class _MyWidgetView extends WidgetView<MyWidget, _MyWidgetController> {
  _MyWidgetView(_MyWidgetController state) : super(state);

  @override
  Widget build(BuildContext context) {

    //////////////////////////////////////////////////////////
    // Widget tree goes here.
    //////////////////////////////////////////////////////////
    return Container();

  }
}
You can see that what we’re doing is extremely simple, it’s just creating one extra class to create a clear separation of roles.
To take it a step further, lets take a look at the famous ‘counter app’:
////////////////////////////////////////////////////////
/// Widget defines external parameters
////////////////////////////////////////////////////////
class MyCounter extends StatefulWidget {
  final Color textColor;

  const MyCounter({Key key, this.textColor}) : super(key: key);

  @override
  _MyCounterController createState() => _MyCounterController();
}

////////////////////////////////////////////////////////
/// Controller holds state, and all business logic
////////////////////////////////////////////////////////
class _MyCounterController extends State<MyCounter> {
  int counter = 0;

  @override
  Widget build(BuildContext context) => _MyCounterView(this);

  void handleCounterPressed() => setState(() => counter += 1);
}

////////////////////////////////////////////////////////
/// View is dumb, and purely declarative.
/// Easily references values on the controller and widget
////////////////////////////////////////////////////////
class _MyCounterView extends StatelessWidget {
  final _MyCounterController state;
  const _MyCounterView(this.state, {Key key}) : super(key: key);

  @override
  Widget build(BuildContext context) {
    return RaisedButton(
      onPressed: state.handleCounterPressed,
      child: Text(
        "${state.counter}",
        style: TextStyle(color: state.widget.textColor),
      ),
    );
  }
}
Again, nothing fancy here, but the separation of duties is already beginning to shine through. State and business logic are nicely contained, and the widget tree is a nice contained blob of layout. We’ve added a textColor property to the Widget, so you can see how the WidgetView could access it.
As a final example, lets take a look at how we might refactor the above login form to use a WidgetView.
WidgetController (aka State)
First, we would define the WidgetController which is responsible for business logic. Specifically, it will manage:
- Local view state
- References to global state
- UI event handlers
- Calculation / Init methods
class _LoginFormController extends State<LoginForm> {

  //Create the "View", passing ourselves in as view.state
  Widget build(BuildContext context) => _ImaginaryLoginFormView(this);

  MainModel model;
  String email;
  String pass;
  String loginFailed;

  @override
  void initState() {
    model = Provider.of<MainModel>(context, listen: false);
    super.initState();
  }

  void handleLoginPressed() {
    //Set some globalState, rebuild view
    setState(()=>model.isLoading = true);
    //Do sign-in stuff
    //Validate email, validate pass, etc
  }

  void handlePasswordResetPressed() {
    //Open the password reminder url
  }

  void handleBackClicked() {
    Navigator.pop(context);
  }
}
WidgetView
Next, we would define the WidgetView, which should be almost pure declarative code. This can either sit in the same file, or its own, depending on your own preference.
class _LoginFormView extends StatelessWidget {
  final _LoginFormController state;

  LoginForm get widget => state.widget;

  const _LoginFormView(this.state, {Key key}) : super(key: key);

  @override
  Widget build(BuildContext context) {
    return Align(
      alignment: Alignment.topCenter,
      child: Container(
        child: Column(
          children: [
            //Back Button
            RaisedButton(child: Icon(Icons.arrow_back), onPressed: state.handleBackClicked),
            ...
            (state.model.isLoading)
                ? ProgressSpinner(color: Colors.white)
                : Column(
              children: <Widget>[
                //Sign In btn
                WhiteRoundedTextBtn(
                  label: "SIGN IN!",
                  onPressed: state.handleLoginPressed,
                ),
                //Login btn
                RoundedTextBtn(
                  bgColor: Colors.transparent,
                  label: "FORGOT PASSWORD?",
                  onPressed: state.handlePasswordResetPressed,
                )
              ],
            ),
            SizedBox(height: 40),
          ],
        ),
      ),
    );
  }
}
Looking at the above code, we can see a few things:
- The clean conceptual break between Control and View code immediately feels more organized
- Both ‘halves’ of the widget are a little more free to grow and expand. They are not polluting each-others class outline.
- We can still include some layout logic in the view itself, leveraging Flutter’s strengths with dynamic layouts
- Passing the entire State object to the WidgetView virtually eliminates the issue of boilerplate parameter declarations
- All related code is grouped together by default, which makes each portion easier to work on
- The additional line-count is only about 10 lines
- One downside is that there is a small amount of boilerplate added, with the ‘state.‘ accessor in the WidgetView
While this might seem like overkill for a Widget this small (and it probably is), if you picture it being 2 or 3 times more complex, with more fields, and some nice animations, you can see how this division could help keep things manageable.
Once you get used to implementing it, it takes almost no time at all. When used consistently it can make your code base more maintainable and easier to navigate.
Worker Smarter Not Harder
To make it easier to implement throughout your code-base, you can create a tiny Abstract class using Generics that all your WidgetViews can extend:
abstract class WidgetView<T1, T2> extends StatelessWidget {
  final T2 state;

  T1 get widget => (state as State).widget as T1;

  const WidgetView(this.state, {Key key}) : super(key: key);

  @override
  Widget build(BuildContext context);
}
Note that we pass the top-level widget type which provides your WidgetView with access to the typed.widget parameters without any additional boilerplate.
This removes another 4 lines of boilerplate, and now our basic WidgeView is just 7 lines!
class _MyWidgetView extends WidgetView<MyWidget, _MyWidgetController> {
  const _MyWidgetView (this.state, {Key key}) : super(key: key);

  Widget build(BuildContext build){
    //_MyWidgetView can now easily access everything on widget and state,
    // properly typed, no parameter passing boilerplate :)
  }
}
Not to be left out, we can make an Abstract class for StatelessWidget as well. In this case, there is no state to reference, so we’re just going to provide quick access to the parent widget:
abstract class StatelessView<T1> extends StatelessWidget {
  final T1 widget;

  const StatelessView(this.widget, {Key key}) : super(key: key);

  @override
  Widget build(BuildContext context);
}
Implementation of that, would look like this:
class _MyWidgetView extends StatelessView<MyWidget> {
  const _MyWidgetView (this.state, {Key key}) : super(key: key);

  Widget build(BuildContext build){
     //Can easily handlers and params values on .widget
   }
}
If you’re using Android Studio you can make this even easier with a couple of code snippets:
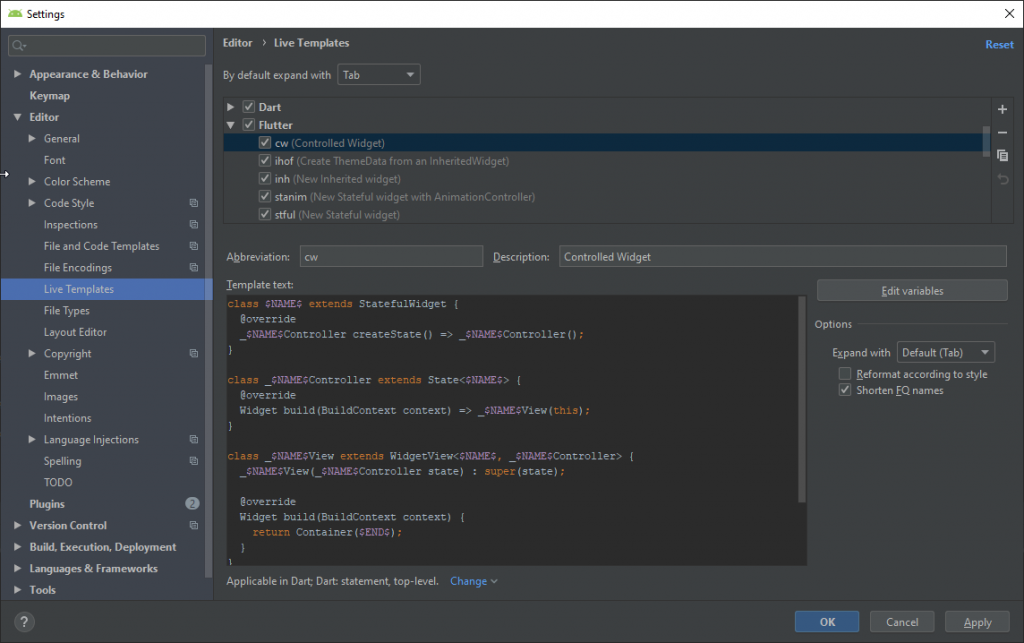
Snippet #1: Add WidgetView to an existing Widget
class $NAME$View extends WidgetView<$T1$, $T2$>{
  const $NAME$View ($T2$ state, {Key key}) : super(state, key: key);
  Widget build(BuildContext build){
    return $END$
  }
}
Snippet #2: New Controller + View
class $NAME$ extends StatefulWidget {
  @override
  _$NAME$Controller createState() => _$NAME$Controller();
}

class _$NAME$Controller extends State<$NAME$> {
  @override
  Widget build(BuildContext context) => _$NAME$View(this);
}

class _$NAME$View extends WidgetView<$NAME$, _$NAME$Controller> {
  _$NAME$View(_$NAME$Controller state) : super(state);

  @override
  Widget build(BuildContext context) {
    return Container($END$);
  }
}
With that in place it’s almost no work at all to use this for your views:
An quick note on responsive…
One of the nice side-effects of organizing your code this way, is that it lends itself extremely well to having multiple views, with a shared controller, which is great for implementing responsive layouts.
For example, you could have a WidgetWatchView, WidgetPhoneView and WidgetTabletView. All with different layout code, but all accessing the same control logic and state.
It might look something like this:
class _LoginFormState extends State<LoginForm> {
  //
  //All the shared event handlers and state could go here
  //
  ...
  //Create different views, depending on the size of the screen
  Widget build(BuildContext context){
  	var size = MediaQuery.of(context).size;
  	if(size.width > 800) return _LoginTabletView(this);
    if(size.width > 200) return _LoginPhoneView(this);
  	_LoginWatchView(this);
  }
}
All views can easily share event handlers and data, using it in different ways, with absolutely no extra refactoring required. This is obviously an over-simplified example of device detection, but you get the idea.
If you made it this far, thanks for sticking with it, this was definitely a very text-heavy post! Hopefully it gives you a fresh perspective on organizing your code, and taming that Widget Tree of Doom!
AWESOME!
Finally an article that will really help developers to have a simple and efficient architecture.
Thank you for this excellent article that will simplify our life as a developer in design pattern research.
Shawn I would like to congratulate you again for not only the content of this article which is truly worthy of excellence but also the teaching method used!
It’s rare to have an excellent article and also the pedagogy at a high level.
Thank you for the time you took to write this long post and your altruism in doing so!
For sure your article should be spread all over the Flutter community!
Awesome. Works well with provider.
Really want a snippet for Visual Studio Code though
Hi,
Thanks for the nice solution. Now the code is nicely separated. But one thing does not leave me calm. My Controller(RegisterController) also have a ChangeNotifier. But when i Navigate with “pushReplacementNamed” then i get the followin error.
A RegisterController was used after being disposed.
Once you have called dispose() on a RegisterController, it can no longer be used.
When the exception was thrown, this was the stack:
#0 ChangeNotifier._debugAssertNotDisposed. (package:flutter/src/foundation/change_notifier.dart:105:9)
#1 ChangeNotifier._debugAssertNotDisposed (package:flutter/src/foundation/change_notifier.dart:111:6)
#2 ChangeNotifier.dispose (package:flutter/src/foundation/change_notifier.dart:178:12)
#3 RegisterController.dispose (package:app/screens/register/register_controller.dart:32:11)
#4 StatefulElement.unmount (package:flutter/src/widgets/framework.dart:4435:12
I think the error appers, becuase there are some “TextFiledController” that try to acces the disposed controller befor the route is removing.
Have someone a solution for this?
Hi again,
i have identify that the problem is when i add a changeNotifier to the Controller like this:
class RegisterController extends State with ChangeNotifier{}
I use a provider to access attributes from the RegisterController:
class RegisterView extends WidgetView {
RegisterView(RegisterController state) : super(state);
@override
Widget build(BuildContext context) {
return MultiProvider(
providers: [
ChangeNotifierProvider(
create: (context) => state,
)
],
child: Consumer(
builder: (context, RegisterController controller, child) =>
SignInPage._(state: state),
),
);
}
}
And that seems not to be the usual way to do this because of the error as mention in my comment above. Could you say me how i can use this with a provider?
There’s a few things wrong with that code:
* Provider(create) should return a new instance. Try using Provider.value() ?
* You will not be able to Consume() a value in the same context you have Provided() it
* I’m not sure what the point of this is. When something in the state changes, it can call setState itelf, and all views below it will be rebuilt. Just pass the controller directly to the SignIn page and be done with it.
I like your approach. But there’s a little mistake.
This part is not working:
class _MyWidgetView extends WidgetView {
const _MyWidgetView (this.state, {Key key}) : super(key: key);
Widget build(BuildContext build){}
}
because 1) there’s no “state” field in _MyWidgetView class
and 2) super(key:key) asks for “state” as first argument
…
According to this: https://stackoverflow.com/questions/54161343/how-can-i-initialize-super-class-variables-in-dart-language
the only way to pass state to superclass constructor is to repeat it in _MyWidgetView.
class _MyWidgetView extends WidgetView {
final state;
const _MyWidgetView (this.state) : super(state);
Widget build(BuildContext build){}
}
Hi all,
Firstly, a big thanks to the author for introducing this simple yet powerful and straightforward method on managing UI and Business Logic. Although I will still trying to understand the abstract class part as I find the explanation on that in this tutorial is minimal, but it is fine as I can self-patch my knowledge online.
Just to contribute back, I realized the author is coding on Android Studio and therefore only shared his knowledge of creating code snippet on AS. As I came from VS Code so I would also like to share how I create a custom code snippet on VS Code.
For VS Code, you have two ways, the first one you have to download an extension called “snippet-creator”, made by nikitaKunevich.
After Installing.
1. Select the code that you want to make it a snippet.
2. Right click on it and select “Command Palette”(or Ctrl+Shift+P).
3. Write “Create Snippet”.
4. Choose type of files needed to be watched to trigger your snippet shortcut.
5. Choose a snippet shortcut.
6. Choose a snippet name.
The second method, is to generate the snippet in json format. This website [https://snippet-generator.app/] is handy to do that.
After that, on VS code go to File->preference->user snippet then choose a programming language to detect this snippet (dart) and paste the json code into the json file.
Thanks! The abstract class is just a bit of syntactic sugar, so you don’t have to define
`_MyState state;`
or
‘MyWidget widget => state.widget`
Hello!
I am new in flutter and I don’t know how to structure my code.
I have tried this tutorial but I can’t.
If someone can provide me a simple code so that I can test it and understand it, I would greatly appreciate it
thank you
Hey Shawn,
Great article! I really like this pattern and I’m trying to apply it in my app. But I’m wondering: How do you handle the communication from the model back to the WidgetController? In my app, I’ve created a “model” that contains some Streams. Whenever a new value is produced I want the WidgetController to be notified, so that in turn it will update the WidgetView. How would you do that?
Thanks!
I’d think you’d just wrap the contents of the WidgetView in a StreamBuilder? Controller probably doesn’t even need to know about it if its just the views binding directly to the model.
Controller is more concerned with managing UI interactions, writing to the Model or BackEnd DB.
That’s exactly what I’m implementing right now. I’m glad that we’ve both come up with the same solution. Thank you!
Hey, I am trying to figure out the distinction between WidgetView design pattern and the MVC design pattern. Am I correct that this is similar to MVC design pattern since both are separating the model, view and controller? Please let me know if I am wrong on this, I’m new to flutter and design pattern in general and have been reading up on different design patterns to try to learn the differences.
Thank you.
Great
@bob – In this case the State is pretty much playing dual roles of controller + model for the view, because it stores data about the view, and also has the business logic to update that data. But you could certainly imagine another setup, where my view data is Provided from above, and the State would then act just as a View Controller.
Most often it’s a mix of the two in production. You will have some local state that can be thought of as the “local model” for that view, and then some app-level state that you also use.
The disadvantages of this pattern is that you can only use it in very small apps as once the widget treee size grows and or the need to access the view-model on on or more screens you will be forced to float the view-model and dependency inject it.
The state solutions can be grouped into:
1. flutter-bloc oriented
2. bloc–oriented
3 non bloc and nonflutter-bloc oriented
Gee, I might be writing a book on this as it seems the ideal meaty
subject that everyone wants.
Right, this approach is well suited to breaking apart complex widgets or views that are tightly related and have some ephemeral state, or a set of controller methods that they want to share.
It’s not ideal for data injection between unrelated widgets, although you certainly could do something like:
Provider<AppState>.value(value: this, …) or `GetIt.I.registerSingleton<AppState>(this)`
if you wanted to, but at that point it’s probably a better idea to just make a dedicated viewcontroller/model/bloc and pass it around with Riverpod or GetIt, rather than trying to pass around a `State` object.
Is there a way to not need all of these in a single file? I tried to separate out the controller into a separate folder and it doesn’t find the view despite an import.
I tried this with a dummy example using the base app from ‘flutter create’ and it looks like StatefulWidget and the State need to be within the same file / imports do not work. This boggles the mind. What am I missing?
Maybe you are missing that in dart an `_` marks classes as private and then they can not be seen outside of the file, unless you use the `part of` syntax.
https://www.phind.com/agent?cache=cll5bsamn009sl508gao3oodp
Or, you can just remove the underscores from the state class, and then it will be accessible to views in other files. This is fairly common in Flutter, for example, when you do `Navigator.of()` you get back the public `NavigatorState` instance.
Thank you so much! That plus your suggested design pattern are very helpful.
Grant,
Given that we can do DDD in flutter and that notifiers are in fact DDD atoms and that we can combine event emitter commands with widget view…it may be time to dust this off and make use of it…
Pros: we never ever have to impl BLoC ever
Cons: none