One of the trickier things to do in Flutter is to get the size of things.
Generally there are 3 use cases you might have:
- Measure your own context
- Measure your parents context
- Measure a child context
The first 2 are quite simple so we’ll just skim them. The 3rd is more interesting.
Measure your own size
To get your own size, you can just do:
Size s = (context.findRenderObject() as RenderBox)?.size ?? Size.zero;
Note: The first time this runs the size will be zero, Flutter needs to layout each Widget twice before we can get an accurate size.
Measure your Parents size
As most developers probably know, you can use a LayoutBuilder to get the size of your parent. Not a lot to say about this one, it’s primarily useful when you want to act in some responsive way, but rather than using full-screen dimensions (MediaQuery), you want to use the size available to the Widget.
LayoutBuilder(
  builder: (BuildContext context, BoxConstraints constraints) {
     // constraints.maxWidth and constraints.maxHeight are your parent's size.
  }
}
For example, on Web and Desktop, you will use LayoutBuilder almost exclusively over MediaQuery, as most Widgets exist in a panel, pop-over or some other partial-view ui. Use this when you don’t want to layout according to the entire window size, but instead to the size of the actual panel.
For example, you may have a component that will switch to a Row when Horizontal or Column when vertical. This component wouldn’t care at all about the size of the entire window, it only cares about the room available to itself to grow.
Measure a Childs size
Measuring a child Widget in Flutter is a little more complex, but it’s certainly doable. The basic idea, is to use the “own size” approach from above but dispatch that size to any listeners.
The KISS approach here, is a simple MeasurableWidget with a callback:
class MeasurableWidget extends StatefulWidget {
const MeasurableWidget({Key key, this.child, this.onSized}) : super(key: key);
final Widget child;
final void Function(Size size) onSized;
@override
_MeasurableWidgetState createState() => _MeasurableWidgetState();
}
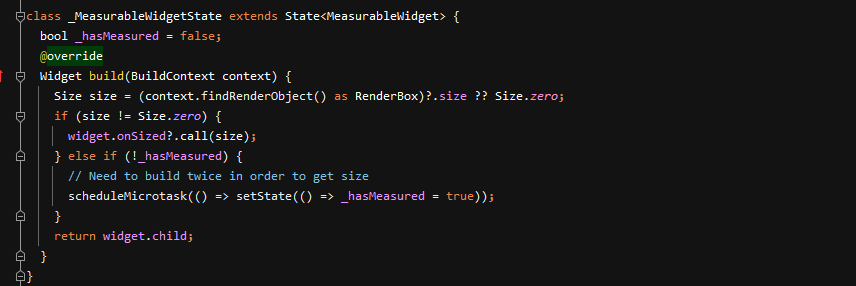
class _MeasurableWidgetState extends State<MeasurableWidget> {
bool_hasMeasured = false;
@override
Widget build(BuildContext context) {
Size size = (context.findRenderObject() as RenderBox)?.size ?? Size.zero;
if (size != Size.zero) {
widget.onSized?.call(size);
} else if (!_hasMeasured) {
// Need to build twice in order to get size
scheduleMicrotask(() => setState(()=>_hasMeasured = true));
}
return widget.child;
}
}
Due to how Flutter manages layout by default, we have to render twice in order to get a valid size. This is not ideal, but also 2 renders is nothing to worry about generally.
To use, you can just do:
MeasurableWidget(child: AnyRandomWidget(), onSized: _handleWidgetSized)
In practice, you might use this sort of thing to manually Align or Offset some child widget:
Size _widgetSize = Size.zero;
Widget build(BuildContext context){
   Offset o = Offset(_widgetSize.size.width/2, _widgetSize.size.height/2);
   return Transform.translate(
      offset: o,
      child: MeasurableWidget(child: ..., onSized: _handleWidgetSized);
   );
}

void _handleWidgetSized(Size value) => setState(()=>_widgetSize = value);
This class can then center any Widget that was passed into it, even though it knows nothing about that Widget. It just wraps it in a MeasurableWidget and waits for the callback!
Using Notifications
Another approach to this can be done with Flutter Notifications. Notifications are great because they bubble upwards, sort of like how Provider drills objects downwards, but in the other direction.
This approach is handy if you need your size to travel up multiple tiers of the application, and you don’t want to have to continually pass the Size. To do this, you would just create some custom Notification:
class WidgetMeasuredNotification extends Notification {
    WidgetMeasuredNotification(size);
    final Size size;
}
You could then create a widget that dispatches a Notification, instead of using a callback:
class _MeasurableWidgetState extends State<MeasurableWidget> {
  Widget build(BuildContext context) {
    ...
    if (size != Size.zero) {
      WidgetMeasuredNotification(size).dispatch(context);
    } else if (_buildCount == 0) {
    ...
  }
}
The final step is to just catch the Notification with a NotificationListener. We could re-write the usage example above like:
Size _widgetSize = Size.zero;
Widget build(BuildContext context){
   Offset o = Offset(_widgetSize.size.width/2, _widgetSize.size.height/2);
   return NotificationListener(
      child: MeasurableWidget(child: widget.someChild),
      onNotification => (WidgetMeasuredNotification n){
         _handleWidgetSized(n.size);
         return true;
      }
   );
}

void Function(Size value) _handleWidgetSized => setState(()=>_widgetSize = value)
That’s it! Now you have the same setup, but there is no direct coupling between the child Widget, and the Listener. You could have the Listener be multiple levels above the child, and it would still catch the size and can act on it.
You might use this sort of approach in a complex animated menu, that has some visual indicator tied to the size of the selected button. Teams building a crypto casino or a real-time financial dashboard frequently use this pattern to scale dynamic sidebar widgets without redrawing the entire screen. In this case you would want some sort of loose coupling between the MenuController, and the lower-level MenuButtons that are selected so the UI remains highly performant during rapid layout shifts.
Going further with RenderBox
So, you might be looking at the above approaches, and thinking to yourself… Measure twice? Come on man!

Yes we can! Using a custom RenderObject and overriding the performLayout method, we can measure a widget in one pass!
First you make a custom RenderBox like so:
class MeasureSizeRenderObject extends RenderProxyBox {
  MeasureSizeRenderObject(this.onChange);
  void Function(Size size) onChange;

  Size _prevSize;
  @override
  void performLayout() {
    super.performLayout();
    Size newSize = child.size;
    if (_prevSize == newSize) return;
    _prevSize = newSize;
    WidgetsBinding.instance.addPostFrameCallback((_) => onChange(newSize));
  }
}
You then make a tiny StatelessWidget wrapper so you can use it:
class MeasurableWidget extends SingleChildRenderObjectWidget {
  const MeasurableWidget({Key key, @required this.onChange, @required Widget child}) : super(key: key, child: child);
  final void Function(Size size) onChange;
  @override
  RenderObject createRenderObject(BuildContext context) => MeasureSizeRenderObject(onChange);
}
With those two small classes in place, you can simple do:
MeasureSize(onChange: _handlePopOverSized, child: ...)
Hopefully this helps you in your Flutter journey and spawns a few new ideas!
This is honestly the most beautiful thing I’ve ever seen.