Recently the Flutter team released a new way to do integration testing called the integration_test package.
In this post we’ll look at some reasons why you should use the new package, explain how to use it, and provide some links to the best sources of documentation and examples.
Note: All code for this post can be viewed in its complete form here: https://github.com/gskinnerTeam/flutter-integration-test-examples
Some history: flutter_driver vs integration_test
The old integration test method was something called flutter_driver. While flutter_driver provides all you need to test a simple app or component, it has major limitations when it comes to a real application:
- you can not easily verify the state of your application
- it is hard to catch exceptions that occur within your application
- can not easily interact with app, like
showDialogorshowBottomSheet - the api was overly verbose and had poor readability
- it requires an external dart bootstrapper to run (not standalone)
integration_test solves all of these issues:
- you can easily access your app state which can be a more robust way to verify the success of your tests, as opposed to using on-screen labels or string-based
ValueKey‘s which can break tests easily - interacting with the app to call
showDialogetc is simple - any exceptions in your widget will immediately fail the test
- the API is cleaner and more readable
Ok, enough of the sales pitch, let’s take a look at how to use it!
Initial Setup
The following is a quick run-through of the core components. For a full working example, checkout: https://github.com/gskinnerTeam/flutter-integration-test-examples
Step 1) Add to your pubspec.yaml:
dev_dependencies:
  integration_test:
    sdk: flutter
Step 2) Create a folder structure like:
/integration_test
  /smoke_test.dart
Note: It is important that the parent folder be named exactly integration_test. This is primarily to ensure the tests run properly on Android and iOS device farms.
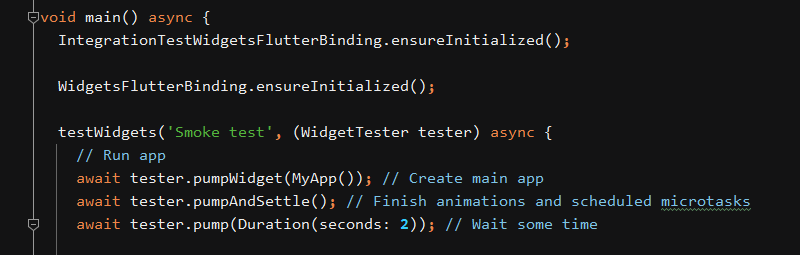
Step 3) Inside of smoke_test.dart:
import 'package:flutter/material.dart';
import 'package:flutter_test/flutter_test.dart';
import 'package:integration_test/integration_test.dart';

void main() async {
  IntegrationTestWidgetsFlutterBinding.ensureInitialized();
  WidgetsFlutterBinding.ensureInitialized();
  testWidgets('Smoke test', (WidgetTester tester) async {
    await tester.pumpWidget(MyApp()); // Create main app
    await tester.pumpAndSettle(); // Finish animations and scheduled microtasks
    await tester.pump(Duration(seconds: 2)); // Render another frame in 2s
  });
}
Step 4) From terminal, run:
flutter test -d windows integration_test/smoke_test.dart
OR
flutter test -d macos integration_test/smoke_test.dart
If all goes well, your app should start up, sit around for a couple seconds, and shut down.
Now you’re ready to write some tests!
Basic Testing
Before you can interact with your app, you must first find something to interact with.
To do this you use the find.byX methods. These include byKey, byText, byIcon, byType and byTooltip among others. You can view a full listing in the CommonFinders class docs: https://api.flutter.dev/flutter/flutter_test/CommonFinders-class.html
As one example, you could look up a textfield and a button using a ValueKey you have assigned to them in the widget tree:
Finder userText = find.byKey(ValueKey('userText'));
Finder loginBtn = find.byKey(ValueKey('loginBtn'));
Once you have a Finder, you can pass it to tester to interact with the UI.
// Enter text
await tester.enterText(userText, 'test@test.com');
// Tap a button
await tester.tap(loginBtn, warnIfMissed: true);
To render frames you can use pump() which renders a single frame with an optional delay, or pumpAndSettle which renders multiple frames until all animations and microtasks are complete. Here we will let the animations finish, and then wait for an additional 2 seconds:
await tester.pumpAndSettle();
await tester.pump(Duration(seconds: 2));
The final thing you’ll need to do for most tests is check some conditions, you can do that with the expect(val1, val2) API. You can check that any 2 objects match, including simple bools or even check for the existence of widgets using some predefined Matcher constants like findsOneWidget:
// Ensure there is a login and password field on the initial page
expect(userText, findsOneWidget);
expect(passText, findsOneWidget);
The integration_test package comes with a bunch of these premade Matcher constants and they are very useful for writing readable tests. For a full list, search const Matcher within the flutter_test docs: https://api.flutter.dev/flutter/flutter_test/flutter_test-library.html.
You can of course also match on basic primitives. Here we’ll check whether all animations have stopped running:
expect(SchedulerBinding.instance!.transientCallbackCount, 0);
Accessing state
Verifying your app state is simple, just look it up by type:
MyAppState state = tester.state(find.byType(MyApp));
expect(state.isLoggedInState.value, true);
In this case isLoggedInState is just a ValueNotifier that exists on a StatefulWidget called MyApp. You could also lookup an ancestor widget if using Provider or something similar:
MyScaffoldState state = tester.state(find.byType(MyScaffold));
UserModel model = Provider.of<UserModel>(state.currentContext);
expect(model.isLoggedIn, true);
Controlling Navigator
Because you can easily access state of any Widget, controlling the navigator becomes trivial.
Assign a GlobalKey to your MaterialApp.navigatorKey, and then find and use it from your tests:
// Get a State that has a reference to the navKey
MyAppState state = tester.state(find.byType(MyApp));

// Use navKey to get current navigator
NavigatorState navigator = state.navKey.currentState!;

// Show a dialog
showDialog(
  context: navigator.context,
  builder: (c) => _SomeDialog(),
);

// Close dialog, method 1
navigator.pop();
await tester.pumpAndSettle(); // let dialog animate away

// Close dialog, method 2
await tester.tap(find.byKey(ValueKey('okBtn')));
await tester.pumpAndSettle(); // let dialog animate away

// Verify dialog was closed
expect(find.byType(_SomeDialog), findsNothing);
This same approach can be applied to bottom sheets and any other type of Overlay content.
With all that done, we now have an app that boots up, enters login credentials, logs in, and tests our basic dialog system:
Not bad for a few lines of code!
Where to Learn More
There are three primary resources to learn more about this API:
- The
flutter_testlibrary provides ambient fields and methods for testing, including the all importantfindAPI:
https://api.flutter.dev/flutter/flutter_test/flutter_test-library.html - The
WidgetTesterclass is the new “flutter driver”. Explore this class for a complete understanding of all the interactions you can perform:
https://api.flutter.dev/flutter/flutter_test/WidgetTester-class.html - The Flutter SDK itself! The Flutter team converted all of their tests to this package, and there are thousands of usage examples here: https://github.com/flutter/flutter/tree/master/packages/flutter/test/material
A good workflow we’ve found is to find API within WidgetTester that look useful, then search the flutter repo for usage examples. For example, if you want to see how WidgetTester.state actually works, you could search for: https://github.com/flutter/flutter/search?q=tester.state, or, to see examples of using findsNothing, look for https://github.com/flutter/flutter/search?q=findsNothing.
WidgetTester can drive too many behaviors to fully cover here, but some of the more useful ones are:
Interaction
- press – Dispatch a pointer down at the center of the given widget,
- tap – Dispatch a pointer down / pointer up sequence at the center of the given widget
- fling / flingFrom – Attempts a fling gesture from a start and end offset
- drag / dragFrom – Attempts a drag gesture from a start and end offset
- longPress– Dispatch a pointer down / up sequence with a delay
- enterText – Give a text input focus and fill it with text
- ensureVisible – Attempts to scroll a Widget into view
- dragUntilVisible – Repeatedly drags a view until a Widget is visible
- sendKeyEvent – Simulates a physical key up event
Rendering
- pump – Triggers a frame render after duration amount of time
- pumpAndSettle – Triggers multiple frame renders, lets animations and scheduled tasks complete
Widgets
- getRect – Returns the rect of the given widget
- getSize – Returns the size of the given widget
- getSemantics – Returns the closest semantics node ancestor
- firstWidget – Returns the first matching widget
State
- allStates – All states currently in the widget tree
- state – Returns one matching state
- firstState – Returns the first matching state
- stateList – All matching states current in the widget tree
For a full listing dive into the WidgetTester docs here: https://api.flutter.dev/flutter/flutter_test/WidgetTester-class.html.
To run this example for yourself, just check out the repo mentioned at the top of the post: https://github.com/gskinnerTeam/flutter-integration-test-examples.
Hopefully this helps get you started with the new integration_testing package. In a future post we’ll take a look at how we can integrate this test into GitHub actions and get a continuous test cycle going (hint: it’s super easy!).
Need help building something cool in Flutter? We’d love to chat.
Thanks for this detailed integration insight Shawn.
Thanks, this is inspiring! Do you know if there is a method to restart the app within a single test?